How to draw a voyage route
This is an instruction on how to use the Voyage Intelligence Tool on the Risk Intelligence System. This includes details on where to find the tool, how to draw voyage routes, and how to view voyages and voyage information.
Watch our video
Read our article
The 'Voyage Intelligence Tool' is found under the Routes symbol, located in the left menu on the screen.
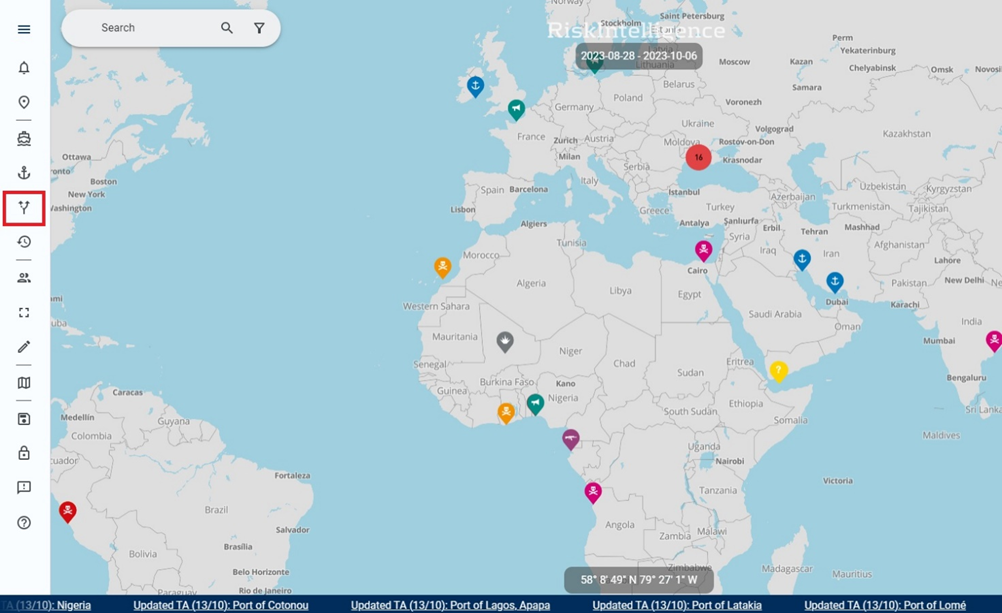
Here it is possible to either plot a new route, to access a previously saved route, or to delete/edit a route.
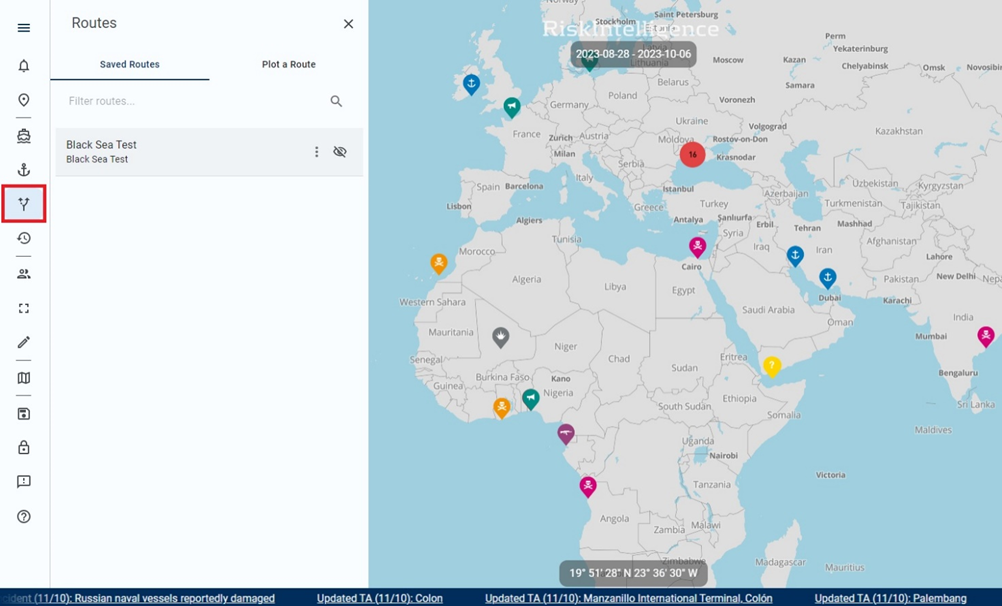
In order to plot a route, click on the 'Plot a route' tab and choose 'Draw a route'


Place the waypoints on the map following the desired route, and when done, click on the last waypoint or click the screen.
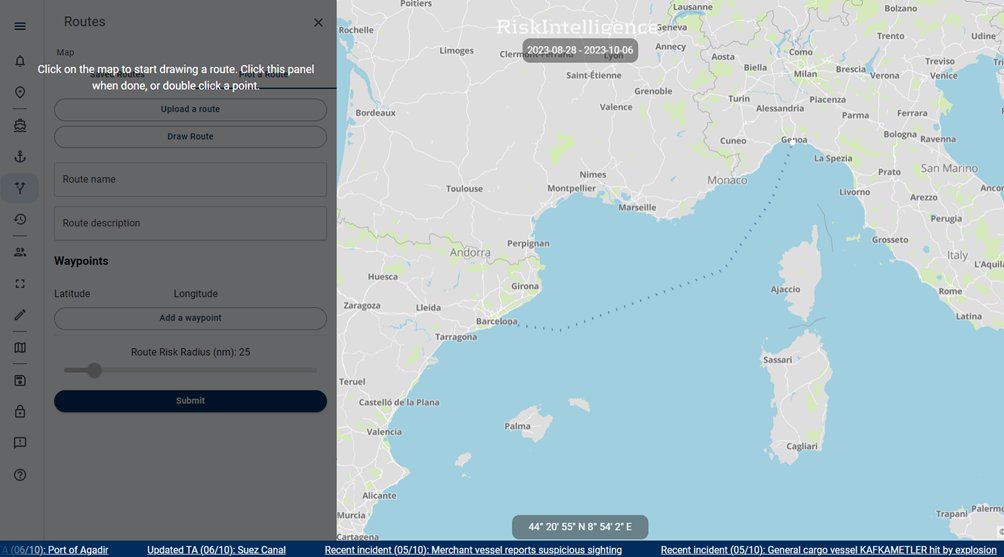
The route must be named and described, and the waypoints are visible below.
The waypoints can be altered/deleted if necessary.
The 'Route Intelligence Radius' can be changed by using the slider at the bottom. The 'Voyage Intelligence Tool' will then automatically display all incidents within the radius for the chosen time period.
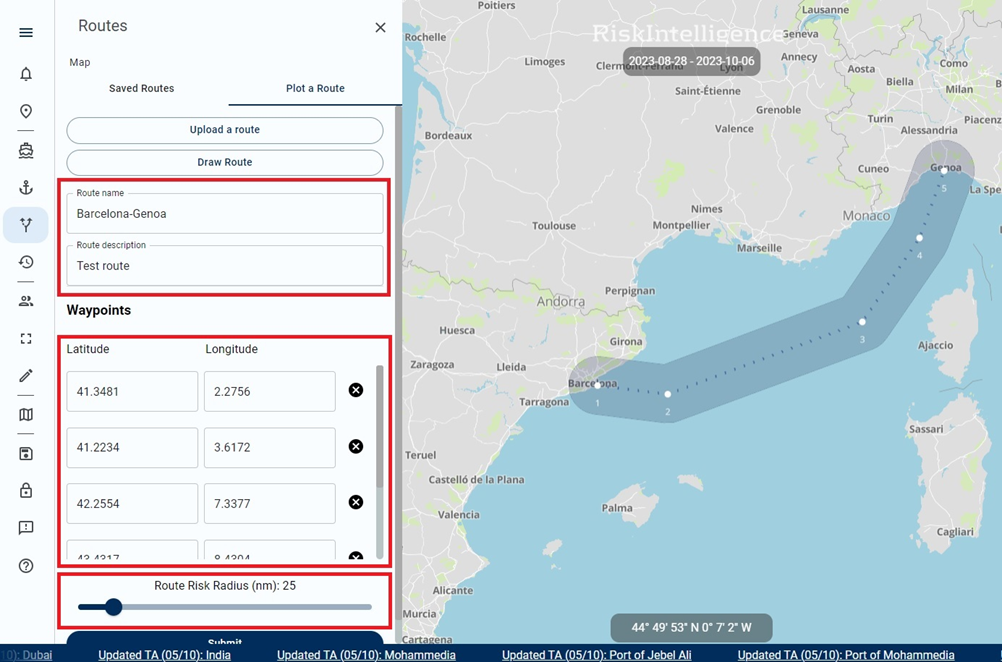
When satisfied with the route settings, press 'submit' and the route is saved and shown on the screen. The route can now be accessed under the 'Saved Routes' tab.
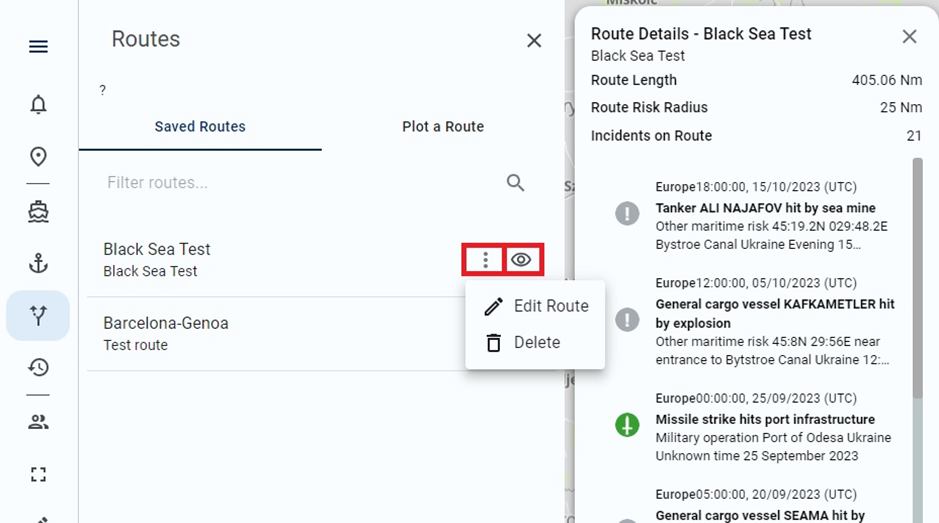
When clicking on a saved route, the route will be highlighted on the map, and any incidents relevant from the 'Voyage Intelligence Tool' are listed.
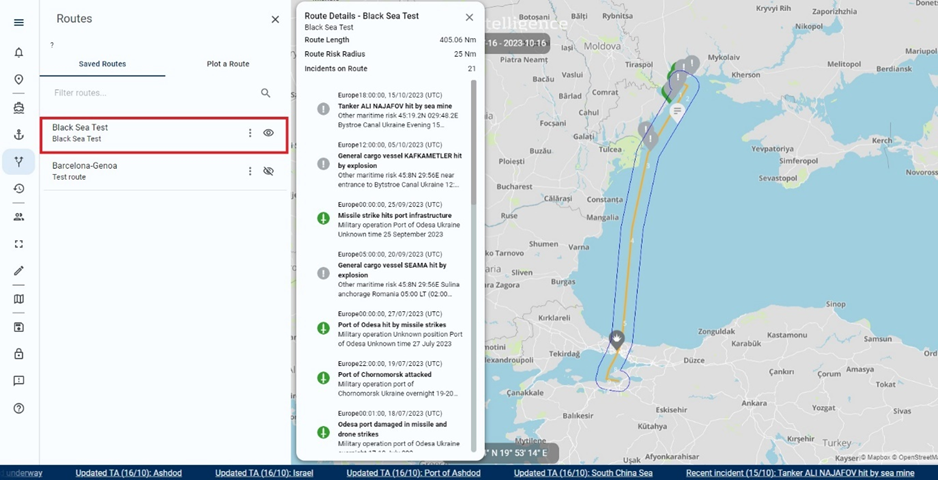
Clicking the 'eye' symbol will remove/show the route on the map, and clicking the 'three dots' next to the 'eye' will enable editing or deleting the route.
